Tuesday, June 19, 2012

More Dabbling With Cookies

     Okay, so I keep getting requests for cookies more than cupcakes so I've accepted the fact that I need to get my butt in gear and really practice my cookie skills. I always get super inspired to try new tecniques with cookies but when it comes down to actually doing it, I totally chicken out for some reason.
     But no more chickening out! My first "project" with my new found determination was dinosaur cookies for my son's class. They turned out pretty cute if I do say so myself. Individually packaged with a cute tag that said: "Summer Playdate? Call: NL" and a phone number, the finished product was quite adorable. It was a cute way to say happy summer to his classmates and open the door to hanging out with friends this summer.
    I've also posted some pics below of an order I had for a similar purpose. The client wanted rice krispies treats instead of cookies shaped like dinosaurs for her son and flowers and butterflies for her daughter. They turned out well but it was A LOT of work! I had to coat all the pieces in chocolate to keep them from getting stale since I was going to decorate with royal icing which would require them to be left out to set and dry overnight. It was a messy job. The coating also helped even out the bumpy surface of the rice krispies treats. I don't think I'll take on rice krispies treats again any time soon. Especially for an order so big! Anyway, all this to say that my cookie decorating skills are slowly but surely getting better. I practiced a lot of the "wet-on-wet" tecnique where RI is piped onto already piped icing while it is still wet. The piped icing sinks into the first layer of icing creating a flat surface appearance rather than raised. Looks cool and you can swirl designs with a toothpick to give it a marbled look.


Rice krispy treat Dinos


Friday, June 8, 2012

Just Peachy!


     One sad day, about 10 years ago, I found out that I had become allergic to fresh peaches. It truly was one of the saddest days of my life. My reaction was nothing too serious but about 2 minutes after I took a bite of a peach, my lips swelled and my tongue, throat and ears became very itchy. It was a good hour or so beforeI got back to normal. (I get this way with fresh figs too. I know, poor me.) So come every Spring/Summer, I face a momentous struggle. Whenever I see a fruit stand displaying mounds of sweet smelling, fresh, juicy, ripe peaches, it takes almost everything in me to keep myself from just grabbing one and devouring it right then and there; allergic reaction or not. Luckily, there is a silver lining in this unfortunate situation: as long as any fruits I am allergic to are cooked or processed, I am fine eating as much as I want. 
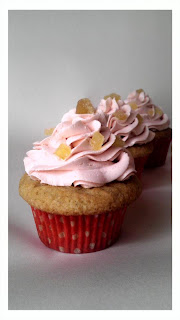
    So, how did I get inspired to bake ginger peach cupcakes? The darnest thing really. I was grocery shopping a couple of weeks ago and as soon as I entered the produce isle, I caught a whiff of an enticingly sweet and fruity aroma. So naturally, I followed my nose and it led me all the way to a giant display of yellow and white peaches. My new mission as of that moment: make peach cupcakes. Ultimately, I came up with a ginger & peach cupcake recipe for which there are two reasons;   1. I adore ginger. And 2. while I was coming up with a peach cake recipe, a can of Ginger Peach Tea by The Republic of Tea was staring at me from across the table. The extra umph to take it over the top: a peach cream cheese filling and peach buttercream frosting. Beautiful. GJW.


Ginger Peach Cupcake

Ingredients:
-2 2/3 cup flour
-1/2 cup butter (unsalted and at room temp)
-1/2 cup of veg. oil
-2 1/2 tsp baking powder
-1/2 tsp baking soda
-1/2 tsp salt
-1 2/3 cup sugar
-3 eggs
-1 tablespoon ground ginger
-1 cup buttermilk
-1 tsp vanilla
-1/4 tsp nutmeg
-1/2 tsp cinnamon
-1 tsp finely grated fresh ginger root
-opt: candied ginger for garnish

*preheat oven to 350F, line baking pans

Directions:
1. Sift the flour, salt, ground ginger, cinnamon, nutmeg, baking powerder and baking soda in bowl and set aside.
2. Cream butter, oil and sugar until lighter in color and fluffly on med-high in a stand mixer.
3. Add eggs, beating well after each one. Scrape down sides w/ a spatula. Add vanilla and grated ginger.
4. Add flour mixture alternating with buttermilk with mixer on low. After all the flour and buttermilk is added, raise speed to med-high and beat until mixture is just combined, scraping down the sides. Do not over mix!
5. Scoop batter into prepared cupcake pans and bake about 18 min to 20 min. Check for doneness at 18 min. Over baking will dry out the cupcakes.
6. Cool completely. Scoop out center with the smaller end of a melon baller to make room for filling.


Peach Cream Cheese Filling:
-1 8 oz pkg of cream cheese at room temp
-2 ripe peaches pureed
-1/2 cup powdered sugar
-1/4 cup of milk (any kind higher that 1%  milk fat)

1. Combine all ingredients and mix well.
2. Pipe into prepped cupcakes. (I use a squeeze bottle for this part)

Peach Buttercream Frosting
-4 egg whites
-1 tsp cream of tartar
-1 1/4 cup sugar
-1/4 cup + 1 tbsp of water
-3 sticks of unsalted butter
-1 tsp of natural peach extract
*opt: a little dab of peach food coloring (if you dont have peach, just mix a little orange and a tiny dab of red)

Directions
1. In a saucepan fitted with a candy thermometer, combine sugar and water and bring to boil. Have a heat proof measure nearby.
2. While sugar is heating, in a stand mixer fitted with a whisk, combine egg whites and cream of tartar and  whisk until frothy.
3. As soon as sugar mixture gets to 248 degrees F, pour into heat proof measure.
4. With mixer on med, slowly pour sugar mixture aiming for side of bowl. Once you establish a steady stream, raise the speed to med-high and continue to add the rest of the sugar mixture.
5. Once all of it is added raise speed to high and mix until the meringue cools to between 75- 70 degrees F.
6. Once it is cooled down, add butter, a few pats at a time with the mixer on med-high. If it starts to deflate and look curdled, just raise the speed back up and continue to whisk. Once all the butter is added, add the extract (& food coloring if using) and mix some more scraping down the sides of bowl.
7. Pipe over filled cupcakes.


Saturday, June 2, 2012

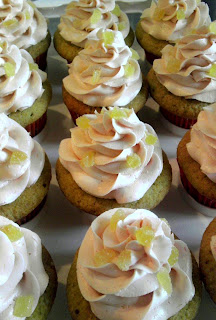
Grapefruit Champagne Cupcakes


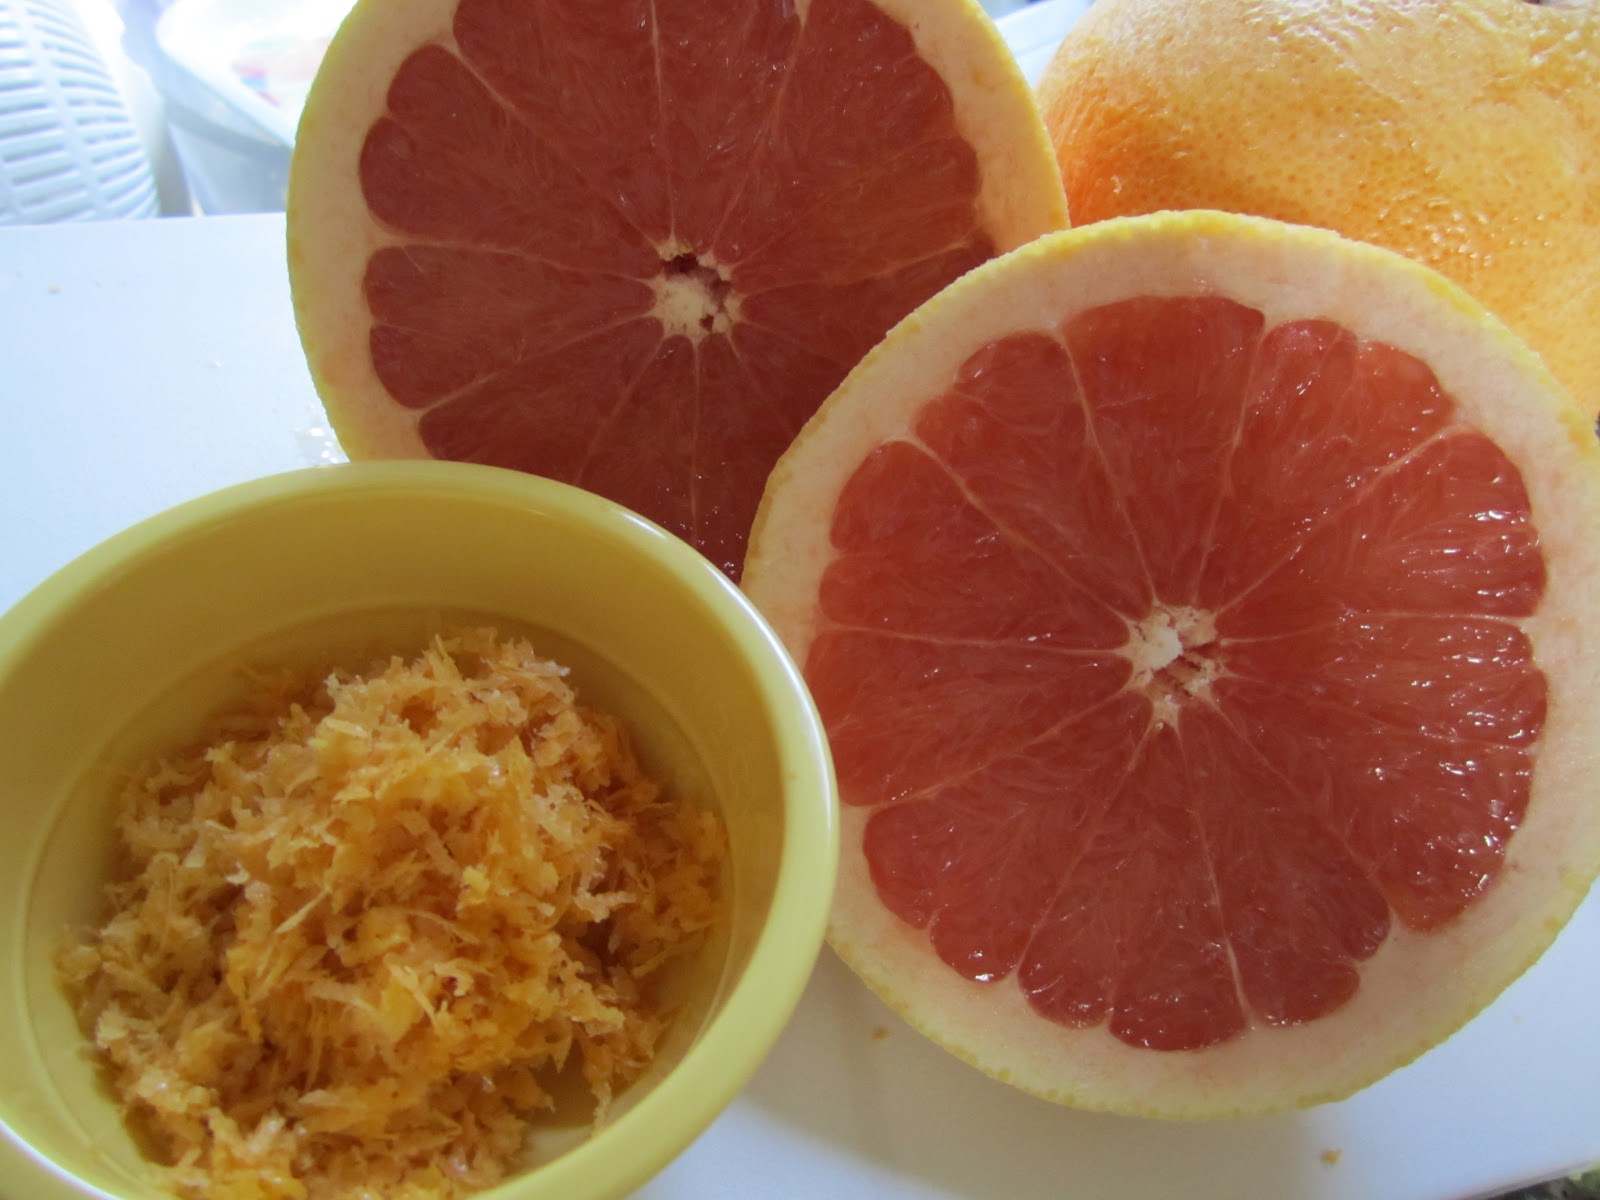
    The end of May is always a busy time for my family. There is Memorial Day, my father-in-law's birthday and my sister's birthday all in one weekend. For my father-in-law's birthday this year, I decided to make champagne cupcakes. It was kinda hard to think of a flavor that would go well with champagne cake that wouldn't take away too much from the champagne flavor. I usually use fresh fruit and vanilla mousse  to pair w/ champagne cake but this time I wanted to try something a little different and actually bake the flavor into the cupcake.  I decided that grapefruit would compliment the champagne flavor nicely. The first batch I made, I folded whipped egg whites into the cake batter aiming for a light and fluffy cake. For some reason, the texture of the cake turned out to be a bit rubbery. It might have been that I over mixed it somehow despite being careful and folding in the egg whites by hand. The second time around I didn't even bother and just added the egg whites plain into the creamed butter mixture. Turned out way better! Did the same the 3rd time and same great texture. I used a moscato pink champagne which is very sweet. As a result I only used 1 cup of sugar. If using dry champagne, I'd use at least 1 1/4 - 1 1/2 cups of sugar.  I also used fresh grapefruit for everything. I only needed 2 large ones for the whole recipe including the buttercream. 
     Speaking of buttercream...for these cupcakes, I thought I would change it up a bit and make a french buttercream (use yolks instead of whites). EPIC failure. I don't know where I went wrong and honestly, I don't care because I will not try it ever again... or for a very LONG time. I just couldn't get the yolks to thicken properly and of course once I added the grapefruit juice, it was all downhill from there. It looked like it was turning out OK at first but once I started to pipe it, it literally began turning back into liquid form right before my eyes! The flavor wasn't "grapefruity" enough either. (It's very hard to make grapefruit flavor stand out in baking!) I had to scrap it all (what a waste of butter!) and start over again using my usual Italian buttercream recipe. Overall, it turned out so-so. The cake part is GJW so it's all good. I think the next time I make these cupcakes, I will try a traditional buttercream recipe, one that uses powdered sugar and butter. I think the grapefruit flavor will carry through a lot better. ANYways, here is the recipe for the cake part only because that was the only thing that came out consistently yummy.

Grapefruit Champagne Cupcakes

Ingredients:

-3 cups flour
-1 1/2 tsp baking powder
-3/4 tsp baking soda
-3/4 tsp salt
-1/2 cup veg. oil
-1/3 cup of unsalted butter room temp.
-1 cup sugar
-6 egg whites
-1 tsp vanilla extract
-1 1/2 cups moscato champagne
-1/2 cup fresh grapefruit juice
-1 tbsp grapefruit zest
*opt: a dab of red food coloring for pink hue


 Directions: Preheat oven to 350 degrees F.
1. Sift flour, baking powder and soda, salt and set aside
2. mix juice and champagne and set aside.
3.Cream butter sugar and oil until light and fluffy. Add vanilla and mix well.
4 Add egg whites little at a time and mix well
5. Alternating, add flour mixture and champagne mixture beginning and ending w/ flour. Scrape down sides and mix just until incorporated.
6. Bake and check for doneness at 15 minutes with a toothpick. If it comes out clean, cupcakes are done.
Cool completely before frosting.


I used little gold stars for garnish. (Wilton)


Sunday, May 27, 2012

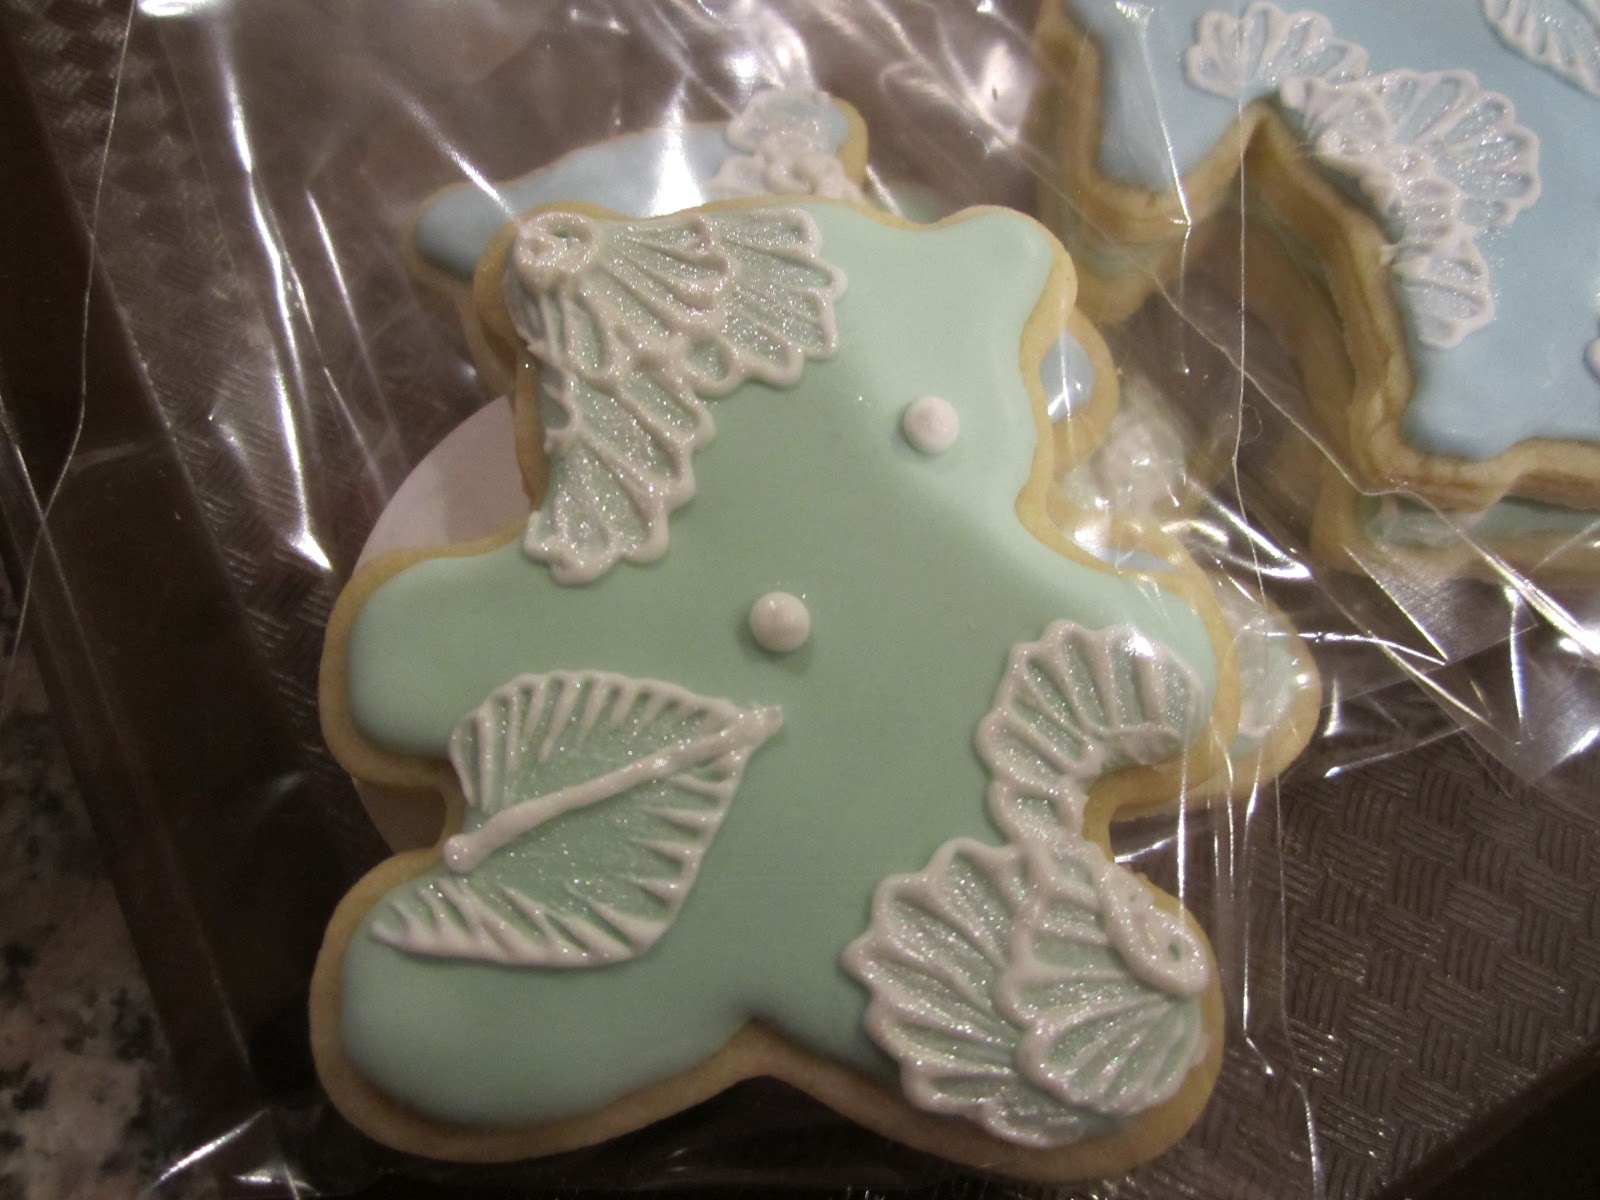
Baby Shower Cookies

    I attended a baby shower this past weekend and it was the perfect excuse to test out my new "baby shower" themed cookie cutters. I thought it would be a nice bonus to add onto the gift. Since my friend is having a boy, I thought the colors blue, green, and yellow would be fitting...I know, kinda stereotypical. Who am I kidding? It's very stereotypical! Apparently there is a general rule of thumb in society that contends men should not wear the color pink. There's nothing wrong with pink on guys, heck my hubs and boys wear it well enough. It takes a real man to wear pink right? Guys who wear it confidently are those who are totally in touch and confident with their manhood and therefore do not care what other people think. That's the way it should be but I digress....back to cookies.
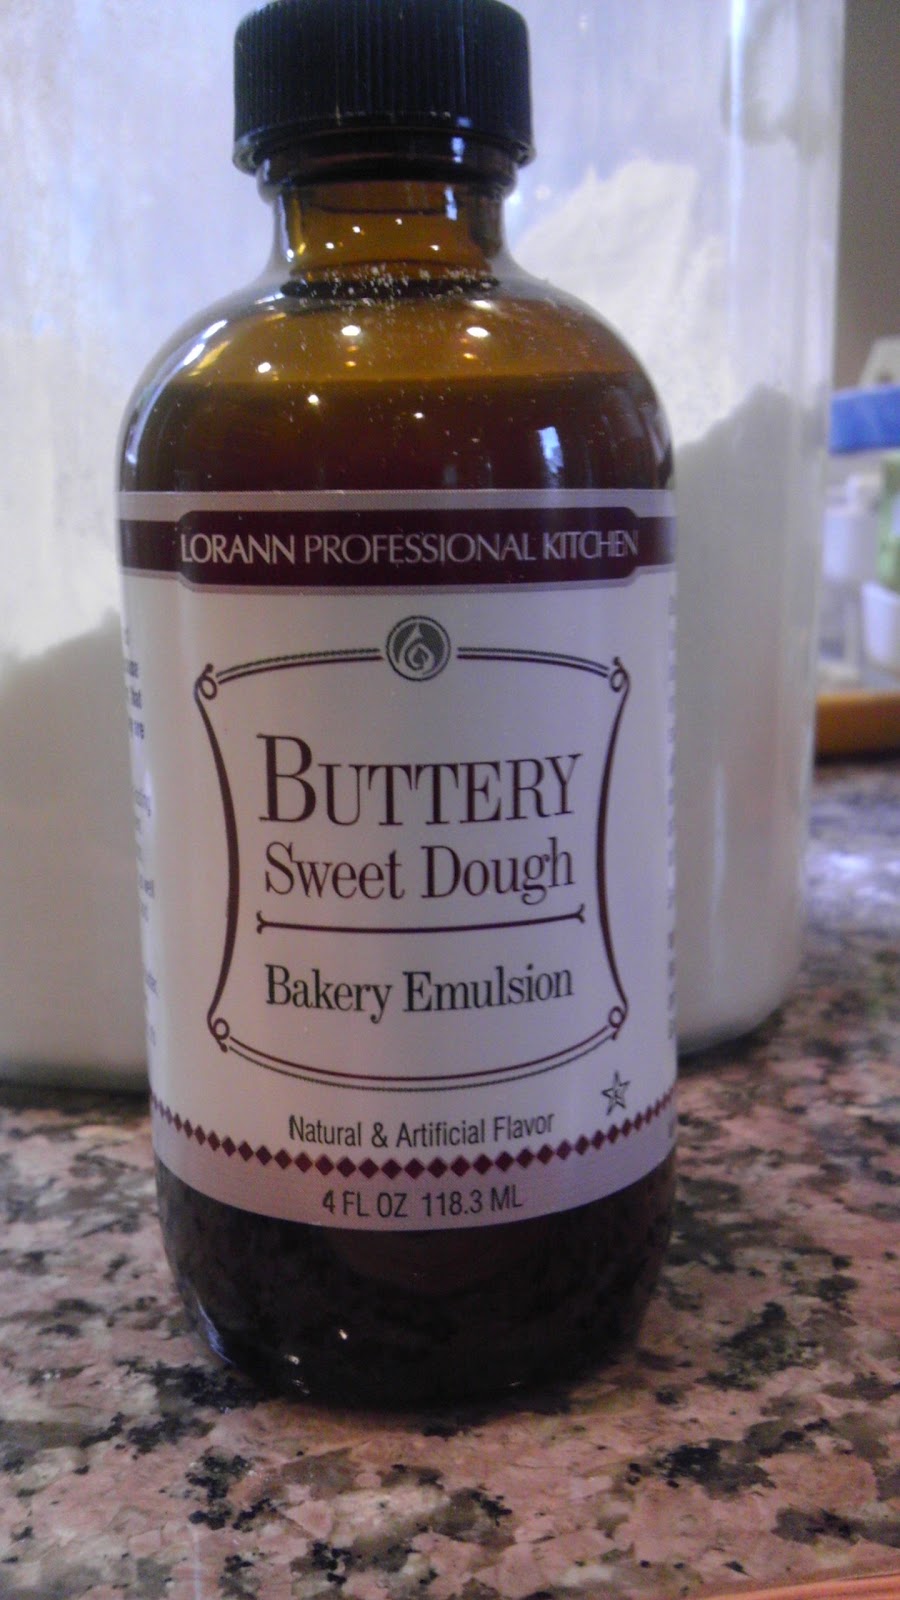
    So yes, the recipe I used is from LilaLoa, her vanilla variation recipe. The only thing I did differently is that I added a teaspoon of Buttery Sweet Dough Emulsion instead of vanilla extract. This cool baking emulsion is from Loranne Oils. You can order it from several places online. I read about it in a few blogs and lately it seems like everyone is using it so I decided to try it for myself. I must admit, I was a little iffy at first just because it was quite the deviation from real vanilla extract which is pretty much a quintessential ingredient in baking but I am happy with the results. Definitely kicks the flavor of plain sugar cookies up a notch....maybe a few notches. I also added a tsp of lemon extract just because I always put it in my sugar cookies no matter what recipe I use. It just brightens everything up.
     As I mentioned before, I'm not the best artist. I was debating whether or not to actually decorate these cookies by "drawing" with the icing to make the cookies look like what they're actually supposed to be but totally chickened out at the last minute. So the brush embroidery technique-my default-was what I used. Totally cute results! After 2 days of searching for the perfect size gift box and failing, I ended up buying a cute basket, brown tissue paper and some pretty green satin ribbon and viola! A gift worthy basket of baby theme cookies!
     I also decided to try out a red velvet cookie recipe. Though the end product looked GJW, I didn't think they tasted too great. I'm sure I did something wrong somewhere along the way. My friends loved them but me, not so much. Did brush embroidery on them too and they turned out beautiful. Pictures are below.


Saturday, May 19, 2012

Vacation in a Cupcake?

     One of my favorite places to go on vacation is Mexico. Cabos, Riviera, Cancun, what have you. My last vacation I took there with my hubs, I must have consumed a year's worth of pina coladas within the 5 days we were there. I swear the stuff was coming out of my pores! I love love LOVE coconut and pineapple together. There is just something about that flavor combination that makes me smile and get all excited inside. I'm smiling right now writing this post just thinking about it! 
     SO, of course it makes perfect sense to turn it into a cupcake. 2 key ingredients for this baby: coconut puree (I made my own) & fresh pineapple filling. We all know fresh is best but I really didn't feel like cracking open a whole coconut and preparing it. I did however, buy fresh cut pineapple and used it for the puree so I guess it evens out...sort of.
     The cake part of this cupcake us purely coconut flavor and isn't very sweet at all. So is the frosting. The pineapple filling is sweet and tangy. You do have to pipe a lot of filling into these cupcakes to balance everything out. My reason for making the cupcake this way is because I think pineapple tends lose flavor whenever it is baked into things. I can tell it's pineapple but it almost always seems to be muted unless it's artificially flavored. I just wanted a creamy, coconutty cake and frosting and a sweet and sour punch tothe filling to counterbalance. This is what I came up with.

Pina Colada Cupcake

Ingredients:
-2 cups flour
-1 tsp salt
-1 tsp baking soda
-1 1/4 tsp baking powder
-3 egg whites (save 2 yolks for the filling)
-2/3 cup sugar
-1 scant cup of coconut puree (directions to make this below)
-1 tsp coconut extract
-1 tsp vanilla
-1/2 cup veg. oil
-3 tbsp butter at room temp
-1 cup buttermilk
*Gonna need about 2 bags of coconut flakes for garnish and puree.

* Preheat oven to 350, prep cupcake pan with liners
1.Sift flour, baking soda, baking powder & salt in a bowl and set aside.
2. Beat egg whites until firm but soft peaks and set aside.
3. In a stand mixer, cream the oil, butter, & sugar until well combined (about 2 min). Add extracts and coconut puree. Mix for another 2 min.
4.  Add buttermilk and flour mixture alternating beginning and ending with the dry mixture.
5. Fold in half of the egg whites w/ a spatula, then fold in the rest of the egg whites.
6. Fill batter about 2/3 way in liners & bake about 18 min. Check after 15 min with a tester and if it comes out clean, take the cupcakes out.
7. Cool cupcakes completely before filling and icing.

Make sure to cool completely before filling and icing!

Coconut Puree

Ingredients:

-1 13oz can of pure coconut milk
-2 cups of sweetened coconut flakes or shredded

1. Shake the coconut milk can well before opening.
2. Combine milk and flakes in a blender and blend until you get a thick puree.
( you will have just enough to make this recipe twice with the amount of puree this yields. Just store any extra in an air tight container and keep in fridge up to 2 weeks. Mixture will harden a little when cold. Just keep out for a couple hours before use and mix well.)
Pretty thick puree, add a couple tbsp of coconut milk if it's too thick. It shouldn't be pasty.

Pineapple Filling

Ingredients:

-1/2 cup sugar
-3 tbsp flour
-2 egg yolks
-1 to 1 1/2 cup of fresh pineapple cut in 1 inch chunks with 1/2 cup of pineapple juice. (OR you can just
   use 1 8oz can crushed pineapple w/ juice)
-2 tbsp fresh lemon juice (about 1 large lemon)
-2 tbsp butter
-1 tbsp vanilla extract
-1/4 tsp salt

1. Combine all ingredients except butter in a saucepan and heat on med-high, stirring as you go. Once mixture begins to warm up, stir in butter.
2. Continue to cook over medium heat, stirring often until thick. (About 7-10 min.)


Filling should drip down from spoon in blobs and not a steady stream.
 Coconut Buttercream

Ingredients:
-4 egg whites
-1 tsp cream of tartar
-1 1/4 cup sugar
-1/4 cup of water
-1 tsp coconut extract
-1/4 cup coconut puree
-3 sticks of room temp butter

Directions:
1. Boil sugar and water in a saucepan fitted with a candy thermometer. Have a heatproof measurer nearby. 2. In a stand mixer fitted with a whisk attachment, combine egg whites and cream of tartar. Once the syrup reaches 248 degrees F, immediately transfer to heatproof bowl to keep from getting hotter.
3. With the mixer on low speed, slowly pour a couple tablespoons of the syrup aiming for side of the bowl. Mix on med-high for a few seconds.
4. Repeat until all syrup is incorporated. Then raise the speed to high and beat for about 7 to 10 min until the temp cools to 70-75 degrees F.
After cooling to 73 degrees. Very and firm and stiff peaks.

5. Once cooled to between 70 -75 degrees, with mixer on medium speed, add 2 tbsp of butter at a time making sure to wait until each addition is incorporated.


Mixture might deflate and soften. If it looks curdled, don't worry, just raise speed to high and continue to add butter little at a time. It's important to mix well after each addition of butter.
 6. Add extract to coconut puree and add to buttercream. Mix for another 2 minutes or so scraping down the sides of bowl w/ a spatula.


The final product should hold it's shape but soft and easily spreadable/pipeable.


To fill cakes, I take the smaller end of a melon baller and scoop out the center. Careful not to dig all the way down.

Pipe in filling. I'm using a no. 7 tip here.

Pipe icing(doesn't have to be pretty) and press coconut flakes over and on the sides all around. You can shape the icing with your hands as you do this.

I garnished with a dried/candied pineapple wedge. Simple and sweet.


YUM! GJW!
*NOTE: The next time I make these, I will put a twist on it and try rum extract in the frosting. Or perhaps a pinapple rum reduction/glaze to drizzle over the top??? I'll let you know how that turns out. 


Friday, May 18, 2012

Chunky Monkey

     Since the beginning of the year, I've had ideas in my head for cupcake recipes and flavors. Nothing too out of the ordinary in terms of ingredients but flavor combos that I love. My ideas were inspired by different things such as a cooking show on TV, a random picture, really yummy looking fruit at a fruit stand, cravings, etc. I came up with a Cupcake Test List that so far has about 10 different kinds of cupcake flavor combos that I am going to try out. I've written down the kind of cake and flavor of buttercream / frosting that I will pair with it, including how I will garnish and yes, even the color of cupcake liner that I want to use. I even have little sketches next to the names of the cupcakes of how I imagine them to turn out. So far I've tested 2 of the 10 and only one of them to completion. By this I mean I tested the recipe 3 times and the last two times the cupcake came out exactly the way I wanted it to...GJW. I've decided to do this for all my cupcake creations so I can be confident about sharing the recipes online.
     So my Chunky Monkey Cupcake (Banana cake w/ Nutella buttercream frosting) is the first one that has passed and met the GJW standard. I always liked the combo but I was actually inspired to bake a cupcake after watching my kid stuff his face with sliced bananas w/ nutella spread on top. It's a favorite snack of his. The cake in this cupcake has good banana flavor with actual chunks of banana all throughout. The nutella buttercream is to die for...or perfect for rolling around naked in. Here is the recipe.


Chunky Monkey Cupcake (Banana Nutella Cupcake)

Ingredients: (Makes about 18 cupcakes)

1 1/2 cup all purpose flour ( i use unbleached for just about all my baking)
1 1/2 tsp baking powder
1/2 tsp baking soda
1/4 tsp plus 1 pinch of sea salt
2 extra ripe bananas
1/2 cup sour cream
1 tsp vanilla
1/2 tsp banana extract (optional)
1/2 scant cup of sugar
1/3 cup butter at room temp
1/4 cup of veg oil
2 eggs at room temp
1 ripe banana diced into 1/4 chunks
*Optional: finely chopped toasted hazelnuts about 1/2 cup for more texture in cake

*Optional for garnish: Banana chips

Directions:

1. preheat 350 degrees F, line cupcake pans
2. whisk flour, baking powder, baking soda, salt (and chopped nuts if adding) in sep. bowl.
3. in a mixer: cream butter and sugar until fluffly, add oil until combined. Add egg one at a time beating for a few seconds after each one.
4. In separate bowl: mash the ripe bananas, add sour cream, vanilla and banana extracts and mix well.
5. With mixer on low, add the flour mixture and the banana mixture to the butter mixture alternating, beginning and ending w/ the flour. raise to med speed and mix until just combined.
6. Add diced bananas and fold w/ a spatula.
7. Fill liners 2/3 way full and bake checking w/ a tester after aout 20 min.
8. Cool completely before frosting. Garnish w/ brown and or yellow sprinkles and top w/ a banana chip.

Nutella Buttercream Frosting

Ingredients:

4 egg whites
1 tsp cream of tartar
1 1/4 cup sugar
1/4 cup + 1 tbsp water
1/4 cup nutella, slightly warmer than room temp.
3 sticks of butter at room temp
1/2 tsp vanilla

Directions:

1. In a small saucepan fitted w/ candy thermometer bring water and sugar to boiling. Stir to dissolve sugar, have a heatproof bowl nearby.
2. Fit mixer w/ a whisk attatchment and put in egg whites and cream of tartar and whisk until combined.
3. As soon as syrup reaches 245 degrees, carefully pour into heatproof bowl
4. Slowly pour a couple tablespoons of syrup into egg whites away from the whisk. Mix for a few seconds. Add a little more and whisk for a few seconds until incorporated. Do this little by little until all of the syrup is added. Once all the syrup is poured in, raise speed to high and mix until mixture cools down to room temp, about 75 degrees (aobut 5 to 10 min).
5. Once cooled to room temp, add tablespoon chunks of butter one at a time with mixer on medium speed beating after each addition. If the mixture looks curdled, no worries, raise mixer speed to high and continue to add butter. Once all the butter is added, the frosting should be smooth. Add vanilla and nutella and mix unitl combined.
6. Pipe or slather onto cooled cupcakes or dip finger into frosting with a swiping motion and lick.


Enjoy!


Thursday, May 17, 2012

My Dabblings in the Cookie World

     It all started one day a few months ago. I was flipping through a cake magazine when I came across a picture of beautifully decorated wedding cake. It's main decoration were these beautiful lacey flower designs that were so delicate. It was sooooooo pretty! I searched and discovered that the name of the technique is brush embroidery (will write a post on this soon). With high hopes I searched for a demonstration video on YouTube. Lo and behold, there it was...a video posting by SweetAmbs (by Amber Spiegel). I was floored! Her brush embroidery cookies are AMAZING!!! Totally GJW. I was so inspired after looking through her blog for the next 2 hours, I made up a grocery list of the ingredients I would need to make these cookies that night and started baking the next day. The result, not so great. I did get the OoOo's and ahhhs but I wasn't fully satisfied with the overall quality of the cookie. I read that she flavors her cookies with orange and cardamom and lucky for me, I had an OK recipe for orange cardamom cookies from way back when in my recipe stash. I used that recipe and though the cookies tasted good, they did not hold clean edges and the final product looked messy and totally amateur. My royal icing flooding was mediocre at best and my embroidery technique was well, let's just say I had a LONG ways to go before my cookies could even resemble Ms. Spiegel's. But with practice and a few test runs for a good sugar cookie recipe, I was able to create GJW cookies (though these wouldn't be very pleasant to roll around naked in but you get the point).  Even the embroidery flowers have a distinctive look that I've come to like a tad bit better...just a little tiny tiny bit. That's the beauty of baking though...every baked creation has a different nuance to it that is distinctive to its creator.
    My go-to sugar cookie recipe is one that I found on a cookie blog called Lilaloa.blogspot.com. The author is amazingly talented and has a great chocolate sugar cookie recipe and a vanilla variation which is the one I use now for all my cookies. Works beautifully flavored with orange zest and cardamom. The only thing I adjust is the amount of sugar and flour, and of course the flavorings I add when making the orange cardamom version-which is what I posted below.

Orange Vanilla Cardamom Sugar Cookies (My variation from Lilaloa.blogspot.com)

Ingredients:
4 cups flour
1 tsp vanilla
1 cup butter at room temp.
1 1/4 cup sugar
1 tsp salt
3/4 tsp baking powder
zest of 3 large oranges
1 vanilla bean (If you're fresh out of vanilla beans, just add an extra tsp of extract)
2 tsp ground cardamom

Directions:
1. Preheat oven to 375 degrees F.
2. Cream butter and sugar. In separate bowl, whisk eggs, zest and vanilla seeds from 1 vanilla bean (split top layer of bean down middle-vertically-with a knife, open it up and scrape all the way down with back of knife to get seeds out).  Once the butter mixture is fluffy, add egg mixture and combine well.
3. Sift flour, salt, baking powder and cardamom. Add to wet ingredients 1 cups at a time beating for a few seconds after each addition.
5. Roll out 1/4inch thick on lightly dusted board. Dough should be used right away.
4. Bake for 7 min. Cookies should not be shiny in the middle. As soon as it looses its shininess, they are done. It takes about 7 min in my oven. The edges should not be brown, cookies should be all uniform in a nice pale color.
**NOTE: If you are going to chill dough, use only 3 1/2 cups of flour! Use more flour as needed as you roll and cut out cookie dough. I re-roll the dough about more times and the cookies turn out fine. Makes a lot of cookies but depends on how thick or thin you roll them. I get about 30 cookies with this recipe rolling it 1/4inch thick.


Royal Icing recipe will come soon...if you can't wait, there is a good recipe on Lilaloa (link above).


These are my very first attempt at brush embroidery using
the old orange cardamom recipe. Sub-par.
                                       
With practice, much better quality!
                                                   
     
    GJW!

     I hope to further explore the world of cooking making/decorating in the future but for now I am thoroughly enjoying making (& eating) these. BTW, these orange vanilla cardamom cookies go great w/ Earl Grey tea and are totally GJW without icing.  Make, eat, be merry!