Friday, March 29, 2013

Choc. Cherry Cupcakes


     I was really craving this flavor combination so I decided to make these. The cake is my go-to double chocolate cake and for the buttercream, I just added melted semisweet chocolate and finely chopped marichino cherries-strained of course-to my usual meringue buttercream recipe. Topped with salted marcona almonds and a whole cherry and VIOLA! Oh, and I stuffed  the cupcake w/ cherry pie filling.


I added 2 tbsp of the marchino cherry juice to the buttercream.


Canned cherry pie filling

Sports Theme Cookies


     Yes, it has been too long since my last posting. I don't really have an excuse besides the fact that I am a stay-at-home mom with 2 boys...I'm not a super mom and when I do finally get my 1 or so of down time in the evening, most of the time I just want to turn my brain off and sit and stare off into space. It's a very effective means of relaxing and re cooperating for me after a LONG day of chauffeuring, cooking, cleaning, diapers, tantrums, etc, etc. Of course when I have the energy, I bake.

I was asked to make these babies for a friend of a friend's son's 1st bday. I had fun making them. The soccer ball was a PAIN since I didn't have a soccer ball cookie cutter - the ones that leave an indentation of a soccer ball pattern in the dough so it's easier to color. I just cut out a pentagon shape out of cardboard and traced it in the middle of the cookie. The rest was easy.


Tuesday, October 9, 2012

Bff's Wedding Cookies

      I know, it's been a while since my last posting but in my defense it's been a crazy past month! School starting, bff getting married, business trips, birthdays, etc, etc. Now with the holiday season nearing, it will only get crazier before things calm down probably around the end of March next year!  Hopefully I will still be able to find time and have enough energy to bake in the midst of it all!
      Anyway, back to this month's posting: My bff FINALLY got hitched this past month and of course I happily volunteered to make my fancy shmancy cookies to be a part of her Sweets table.  Props to Amber Spiegel for giving me the inspiration. I can never get my cookies to look exactly like hers! Pulled out all the stops for these babies: orange zest, cardamom, and vanilla bean flavor, hand painted with gold dust, and handmade tags. I have to admit, it was quite a feat even though I only made about 100 of them. More so because I was running around like a mad woman trying to do my M of H duties with both kids by myself for the whole week before the big day at the same time. The color palate fit perfectly for as my bff called "a vintage-Marie Antoinette-gone crazy in a country cottage" theme wedding. I used a scalloped edge round  cutter to get a little extra detailing in because I wanted to save time by not piping a beaded border around each one. I can only imagine how pain stakingly long THAT would have taken. My hand cramps up just thinking about it. I think these turned out pretty well considering I'm just an amateur.       

4 different punchers, tweezers, neck cramps and lots of
shifting of body weight to make these tags...


Pictures don't do justice to how sparkly these look with the gold.


Tuesday, September 4, 2012

Raspberry Ombre Cake


         1AM, I  was doing my daily/nightly routine of perusing through my fav baking blogs in bed when I saw this beautiful cake on Glorioustreats.com. Of course I was inspired. I could have jumped out of bed right that second to go downstairs to the kitchen and try it and maybe might have (insomniac) if it wasn't for my little Grant waking up. So I did the next best thing, woke up the next morning and made it instead. Before that night, I only associated the word "ombre" with my sister's latest hair style. Didn't think to apply it to baking! It was perfect timing actually, I was looking for a special cake to bake for my mom's bday and this ombre cake was perfect. Of course the first try, I actually ran out of buttercream so I had to improvise. I won't say how because....I just won't. But the end product was great. The inside of this cake is soooooo beautiful, the pictures here don't do it justice. Since then I've make this cake 4 more times and I've got it down pat. The amount of buttercream and batter for 5 even layers of cake. The coloring process is really up to you and the 5 times I've made this cake, I've tried 5 different hues of pinks and purples. It's really up to you on the colors...lots of room for creativity there.  Oh, and I didn't use 5 cake pans because I only have 2. It's just a little more time consuming but the cake layers are so thin, they really take no time at all to bake up.


3rd time's a charm!

Friday, August 31, 2012

Cereal Milk Cupcakes....Oh yes I did!


     This post is a tribute to my BFF and her love of food. It's this love for yummy things that  brought us together 12+ years ago and since then our friendship has grown so much that I can't really explain with words. All I can say is that I love her to death. I am also giving all credit for this post to her because she, in her genius-ness, gave me the idea to come up with a CEREAL MILK flavored cupcake.
     My BFF currently resides in California but before that she lived in New York, before that, went to school at Princeton, and in the midst of living in all these places, she has also been to Africa, Thailand, and a bunch of other places, too many to list. Needless to say, she is quite the traveler. She has probably eaten in more restaurants and tried more kinds of ethnically diverse foods than a normal person ever could or would in a lifetime. If you are a foodie, you probably know the cereal milk sensation started from a restaurant in New York called Momofoku. I've never been there myself, I've never even tried their cereal milk ice cream or cookies but I appreciate their creativity. I mean, seriously, Cereal milk! That unapologetically milky-sweet, creamy goodness left over at the bottom of the cereal bowl- turned into a flavor for a dessert! GENIUS. I must give due credit to Mr. Jenk at Cafe Fernando for it is on his food blog that I found his genius (I know, I'm using this word a lot today) recipe for making cereal milk. I tweaked it just a little to yield more. Yes, making it was a process and I recommend you do the milk thing a head of time but TRUST ME, it is well worth the labor! The end product was so yummy, it will brought tears to my eyes when I bit into it!

Cereal Milk
Good old fashion corn flakes


2 cups cornflakes
1/4 cup of nonfat dry milk
4 tbsp sugar
1/2 tsp salt
1 1/2 stick of unsalted butter melted
3 cups of whole or 2% milk  
This stuff does wonders in baking!


1. preheat 275 degrees
2. crush flakes then add melted butter, mix well.
3. combine sugar, powder milk, and salt first then add to flakes
4.spread out evenly on 2 baking sheets on parchment or foil and bake about 35min.
5. Reserve about 1/4 cup for garnish later. Steep in  3 cups of milk for about 2 hours then strain. Double strain if you want a cleaner milk but this doesnt really matter. *warning: do not drink cereal milk because you may not have enough for the recipe!
6. Refridg. covered if not using right away.


What the cereal mixture looks like after it is baked. I reserve some for garnishing. Very crunchy!

After you steep in milk and drain. I double strained mine....

...to get this beauty. Took all the strength in me not to gulp this whole thing down!


Cereal Milk Cupcake:
1 3/4 cup of flour
2 tsps Baking powder
3/4 tsp salt
1 1/2 cup cereal milk
3 eggs
1 tsp vanilla
1 cup of veg. oil OR melted unsalted butter
1 cup sugar

*preheat 350 degrees
1. Sift all dry ingredients except sugar in a bowl and set aside
2. Combine eggs and sugar in mixer and beat until fluffy.
3. Add oil OR butter and mix well scraping down sides w/ spatula
4. Add flour mixture and cereal milk in 3 additions alternating starting and ending with flour with mixer on low.
5. Scrape down sides and mix on medium speed until just combined. Do not over mix!
6. Load into prepped liners and bake about 15 to 18 min. Check for doneness at 15min.
7. Cool completely before frosting.
8. Frost these babies up, eat and have a party in your mouth.

Cereal Milk Buttercream

4 egg whites
1/4 tsp cream of tartar
1 1/4 cup of sugar
2 to 2 1/2 sticks of unsalted butter at room temp.
1/4 cup of water
1/2 tsp vanilla
pinch of salt
1/4 cup of cereal milk

1. Combine sugar and water in a pan fitted with thermometer and bring to 248 degrees. Have heatproof measure nearby so you can transfer as soon as it hits 248 degrees.
2. Combine egg whites and cream of tartar in mixer and mix well.
3. Once sugar hits 248 degrees, transfer to measure (I just pour directly into the eggs but then again I've done this a gazillion times). Drizzle slowly into egg whites in a steady stream with mixer on low. Aim for side of the bowl.
4. Once sugar is all in, mix on high until temp of meringue is between 75 and 80 degrees.
5. Add butter 2 tbsp at a time and mix on high until buttercream consistency is achieved (should be pretty stiff). Add vanilla and cereal milk. You can add more to taste little by little until you are happy with the flavor. I find that between 1/4 cup and 1/2 cup is enough. Adding too much can ruin your buttercream so proceed with caution after 1/4 cup.
6. Garnish with reserved cornflakes or cereal of choice!


Garnish with whatever kind of cereal you please...wanted to use Fruity Pebbles but didn't have any in the house.


Minis

Garnished w/ crushed Fruit Loops

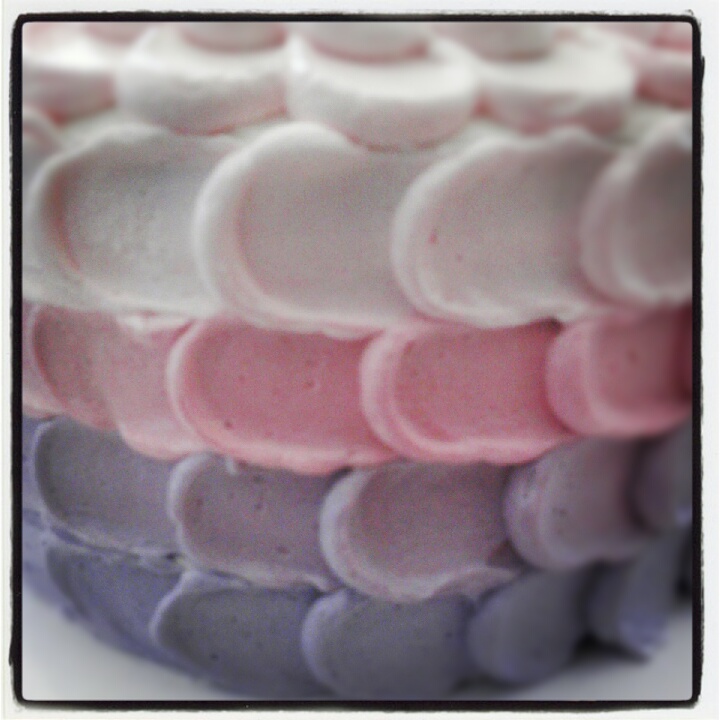
I salivate every time I look at this.


Sunday, August 12, 2012

S'mores Galore


     So it is mid August and Summer has FINALLY decided to grace Seattle with her presence. The sunshine and heat may have come late but my summer cravings were certainly on time!
     Every time I went to the store, I would see huge S'mores stations at every corner. "Campfire size" jumbo marshmallows, boxes of graham crackers, and of course, Hershey's chocolate bars. I would stand there for a minute day dreaming of beaches and bonfires, of the sound of the ocean, wind in my hair....then I'd be thrust back into reality as my hands gripped the still wet handle bars of my rain drenched shopping cart. It rained a lot this summer. So what did I do?  I bought a food torch. One of those cool creme brulee torches. It has officially become one of my fav kitchen tools to use.
     So back to s'mores...it's been done before in cupcake form, surely not a new idea but this is my version - which is pretty similar to a lot of versions out there. But still, my version.  The cake is my favorite double choc cake recipe with boiled icing both from my fav book Miette. I skip a few of the steps in the original recipe in the book just because I don't really find it necessary and the end product is just fine. It yields more cupcakes this way as well and I cut the sugar down a bit since this cupcake is very sweet! There is a graham cracker layer on the bottom, then a crusted layer baked in on top, and THEN again a layer on the bottom of the frosting that adds a little more umph for presentation. The Hershey chocolate square garnish completes it. Make it, bake it, and make "nom, nom, nom" sounds as you eat it. TRUST me, it tastes even yummier if you do this for some reason.

Graham Cracker layer:
-about 2 packages of graham crackers (there should be 3 in a box)
-1/4 cup of unsalted butter
-3 tbsp of sugar

Directions:
1. Take one pkg of crackers and smash in a ziploc bag until you get a fine crumb. Dump into bowl and at sugar and melted butter. Mix with a fork until combined.
2. Put a heaping tsp full of crumbs into each cupcake liner and press down with something flat (middle finger works just fine). Bake for 5 min and let cool before adding batter.
3. Reserve left over crumbs to sprinkle on top of batter.


Double Choc. Cupcake Recipe (adapted from Miette)

Ingredients:
-1 1/2 cups of all purpose flour
-1 1/4 cup of cocoa powder (unsweetened)
-1 1/2 tsp baking soda
-1/2 tsp baking powder
-3/4 tsp salt
-2 oz of 70% cacao chocolate
-1 cup of boiling water
-1 cup buttermilk
-1/2 tsp vanilla extract
-2 large eggs at room temp
-1/2 cup veg. oil
-1 1/4 cups sugar

Directions:
1. Preheat oven to 350. Line cupake pans. Sifter together flour, cocoa, salt, baking soda and baking powder and set aside.
2. Combine chopped chocolate and boiling water in a heat proof bowl. Stir and set aside for 15 min.
3. Mix buttermilk and vanilla in another bowl and set aside.
4. In a stand mixer, whisk eggs until foamy (about 2 min), add the oil slowly with mixer on low. Then beat on med speed until completely combined.
5.Reduce speed and add the chocolate mixture to the egg mixture. Then slowly pour in buttermilk mixture. Add the sugar and whisk on med until fully incorporated.
6. Slowly add the flour mixture with mixer on low. Mix on med speed for 5 sec. Scrape down sides and mix for about 10 secs on med high. Do not over mix!
7. pour into prepped liners until 2/3rds full. Sprinkle leftover graham cracker crumbs on top and bake. Check after 15 min.


Recipe for Boiled Icing here.

Garnishing and frosting:
-One pkg of graham crackers with large crumbs
-Hershey chocolate bars


1. Pipe a ring of frosting around the perimeter of the cupcake top. Press crumbs into frosting all along the edges.
2. Pipe to fill in the rest of the cupcake top in a circular motion.
3. Use a food torch to brown the outside of the frosting
4. Stick a Hershey square (2 pieces) in the middle.


Tuesday, August 7, 2012

Royal Icing EPIC FAILURE

Today, my morning was off to a great start. Woke up to these cuties & some pretty wet good-morning kisses.


I was very happy also because the night before I had done this:


I came downstairs to make breakfast and check on my happy little owls and saw this had happened to almost all of my cookies:


I wanted to do this:


I frantically tried to save my precious little creations but then ended up with this:


 SO I had to this:
 What a waste!

I wanted to do this:


So what is the point of this post?

LET YOUR ROYAL ICING REST FOR AT LEAST 10 MINUTES and stir out all the bubbles before piping!!!! Mix your colors, get the consistency to whatever you want and then LET. IT. REST. All the bubbles will come up to the surface and all you have to do is gently swish a spoon/spatula through and no more bubbles. I know, so easy. Such a small step to avoid such a huge catastrophe.

I learned my lesson the hard way. What was the hard way? I had to make a new batch all over AGAIN. Not good.